Hi
Recently I was asked to do a tutorial on New Look 6206. I had made this dress as a Semi-Formal for my daughter last year. Here is a picture of the dress that I made her.
 This was view A. Today for the tutorial I will be doing view B. I'm not going to say that this is the only pattern out there with this style of bodice, so I did a brief search and found a few patterns that will give the same style of look. Pattern 1, Pattern 2, Pattern 3, Pattern 4, Pattern 5, Pattern 6, etc. Now that you get the picture of finding what style of pattern that you want, I'll start with this pattern since it is one that I have on hand and I've already ventured into before. On my daughter's dress I made changes to the skirt (fitted) and I shortened the skirt to fit her. With this tutorial I will be making the dress as it is in the pattern.
 Here are the items I will be using for this tutorial. I will try not to serge, but that will be hard. The fabric that I used for the first dress is a glitter double knit (fancy/ formal). The fabric that I am using for this project is a Rayon knit. It feels like cotton jersey, but it's soft and flowing which is something that I wanted for this particular dress.
To start, this is a pattern that has to be assembled in 3 parts, the bodice, then the skirt, and then join those 2 together. You can start with either the bodice or the skirt first, but I like to go with the hardest first,,,the bodice. Once all the pattern pieces are all cut out, notches, and markings are done you are ready to begin.
 Of all the markings and sewing that you will do with this garment, these are the most important markings. These are the markings that make the V in the center of the dress. There will be 4 layers to have to make the markings through. Be sure that you clip and mark through all 4 layers.
 For View B, this is the first step. With both pieces you will need to stitch from the large dot to the small dot. One set of bodice will be facing outward and the other will be the lining/ back to the front. Your stitches should be set to zig-zag and you might want to have a ball point needle which is better for sewing knits.
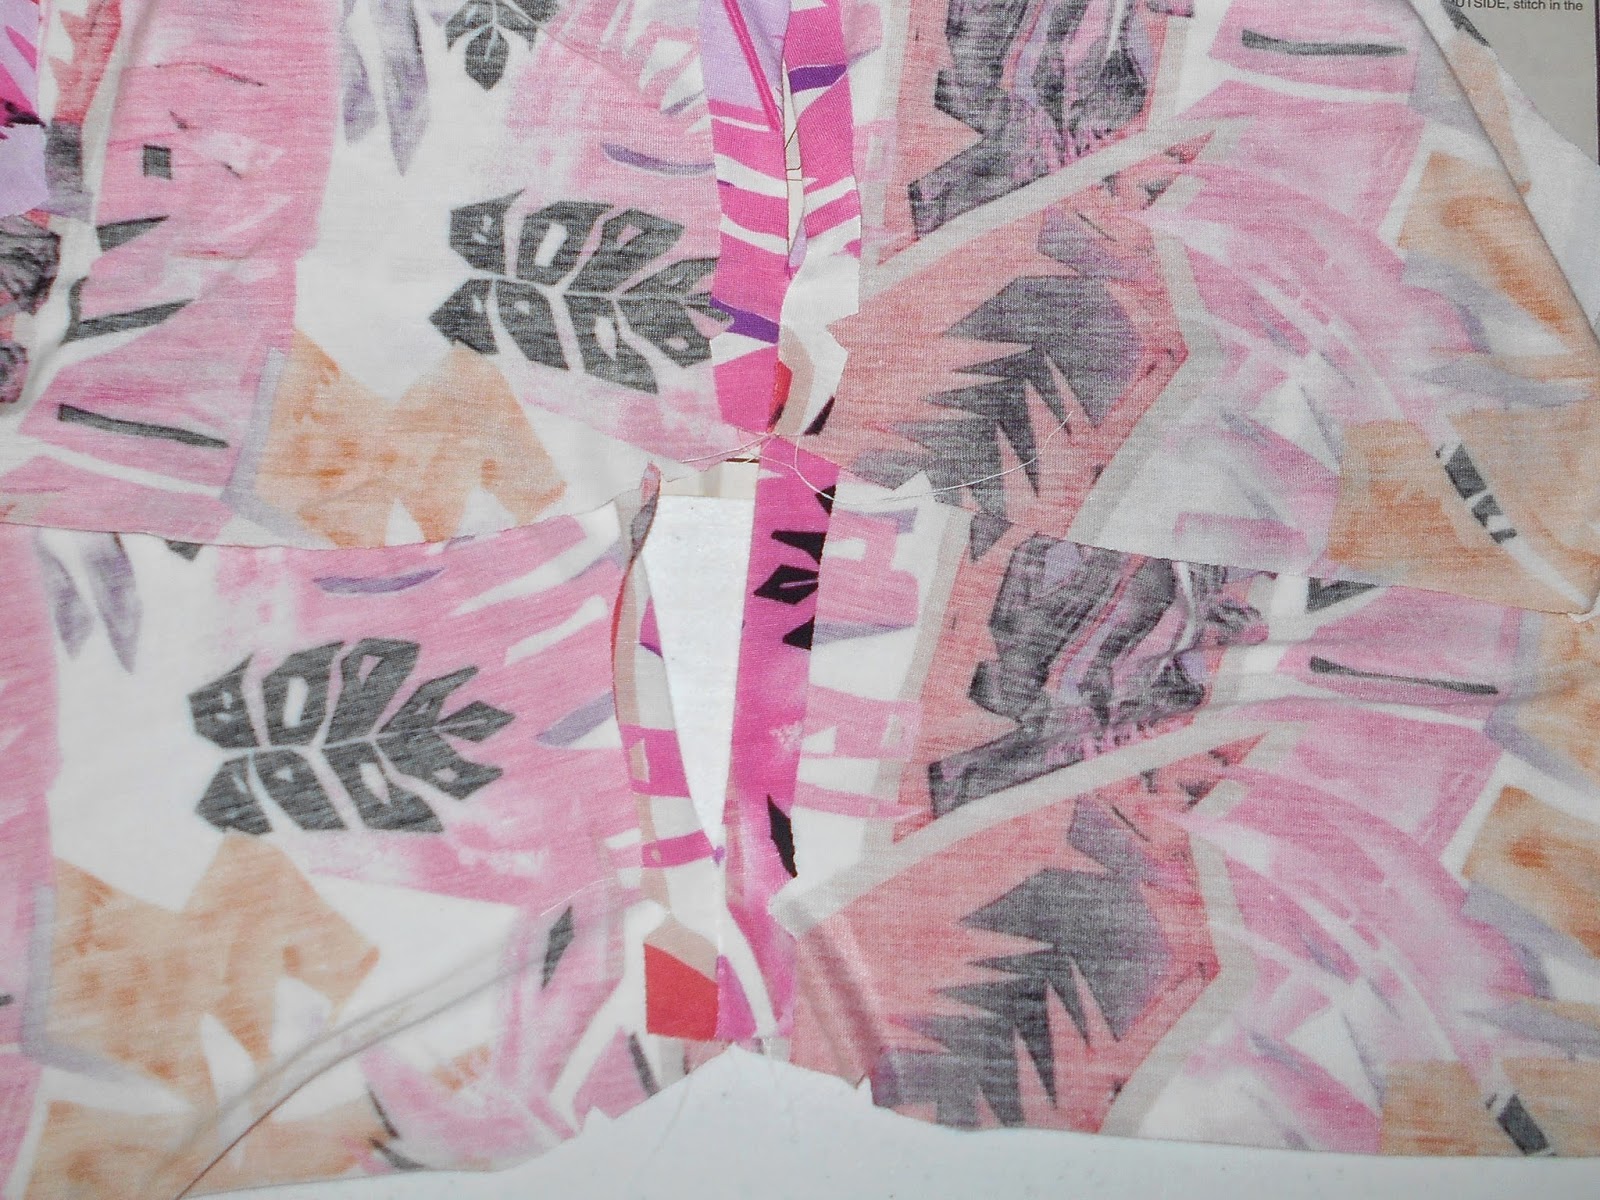 This is what both pieces will look like with the center stitched together. Press the seam on both pieces open. Then take the bodice back and match the notches to the bodice front notches (side) for both pieces.
 All of the previous photos are step 3 from the instruction sheet. Be sure to press your seams open. Next is step 4, stitching all of this together. Here is where I do what I do best,,,,PIN,PIN,PIN.
 I pinned all the way around even to where the dots are where I began my first stitch. I started my stitch close to the dot then stitched all the way around to the other side of the bodice and the other set of dots. This is Step 4 from the instructions sheet.
 After I finish joining the bodice pieces, I trim. Trimming will take away some of the bulkiness especially on the ties and the underarm, but DO NOT cut beyond the seam line that joins to the back(show you why later).
 When you are done trimming the excess, turn the bodice right side out and press. At the bottom of Step 4 there is an important message and here is what it says "Stitch straps and upper edge of back, breaking and reinforcing stitching at large dots. Layer seams". This would seem to be difficult, but it's not. What this means is the little V that you made first has to be adjusted. The instructions are telling to to cut, break, or do what you need to do in order to get the look. (Please, no stretching)
 When the center seam is lined up and centered the way you want,,,Press it, keeping the front seams flat. This will keep the bodice pretty and neat. On to step 5. Step 5 is why you didn't trim all the way around the bodice. Here you have to add your elastic to the bodice back. Use the elastic guide to show you how much elastic is needed for the back. Some of you will need less elastic, but go by the guide as a general rule and then try your top on and cut down from there.
 In Step 5, you can see that the elastic goes just beyond the seams. Pin both ends of the elastic down according to the instructions. If you look close to the picture below you will see that I placed the elastic edge just at the seam that joins the two back bodice pieces. This is how you will pin the elastic all the way across, tugging gently to make sure that the back bodice and the elastic are evened out. Once pinned down, stitch.

 As you stitch the elastic to the back bodice, tug the elastic as you sew from pin to pin, but try not to pull the fabric.
 This is the finished bodice back. At this point try the bodice on and see if the back is tight enough or loose enough. How ever you decide to fit your bodice, here is where you will make the change in the fit.
Thus far we have completed the bodice. In my next post I will be visiting Step 7, the possibility of embellishments and completing the skirt.
Thank you for joining me today. Until next time,
Lots of Love,
Dellia
Recently I was asked to do a tutorial on New Look 6206. I had made this dress as a Semi-Formal for my daughter last year. Here is a picture of the dress that I made her.
To start, this is a pattern that has to be assembled in 3 parts, the bodice, then the skirt, and then join those 2 together. You can start with either the bodice or the skirt first, but I like to go with the hardest first,,,the bodice. Once all the pattern pieces are all cut out, notches, and markings are done you are ready to begin.
 |
| Back |
 |
| Front |
Thus far we have completed the bodice. In my next post I will be visiting Step 7, the possibility of embellishments and completing the skirt.
Thank you for joining me today. Until next time,
Lots of Love,
Dellia
Comments
Post a Comment